
Text instruction
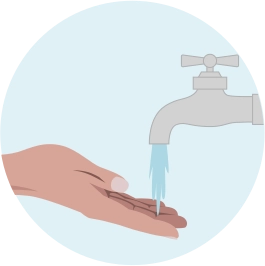
Wash Hands
Wash your hands thoroughly with warm water and soap.
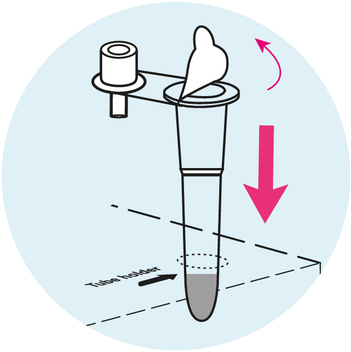
Prepare Buffer Tube
Remove the cover of the buffer tube and insert the tube into the dotted circle on the packaging box or into the tube holder.
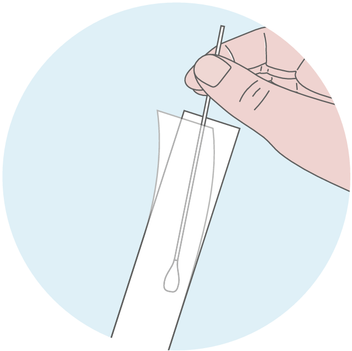
Remove Sterile Swab
Remove the sterile swab from the pouch.
Do not touch the soft tip of the swab.
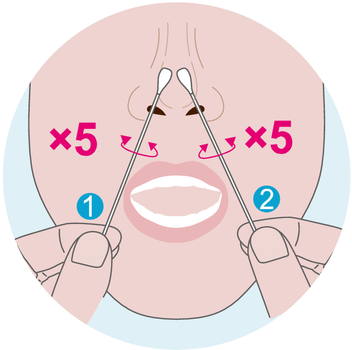
Swab Nose
Insert the swab into one nostril (Approx. 2 cm deep).
Slowly rotate the swab 5-10 times, rubbing it against the nasal wall.
Note: This may feel slightly uncomfortable. Do not insert the swab any deeper if you feel strong resistance or pain. When the nasal mucosa is damaged or bleeding, nasal swab collection is not recommended. If you are swabbing others, please wear a face mask. With children, you may not need to insert the swab so deep into the nostril. For very young children, you may need another person to steady the child’s head while swabbing.
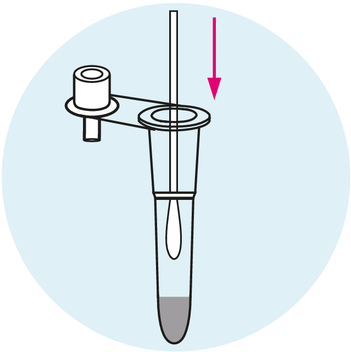
Place The Swab In The Tube
After collecting sample, insert the swab’s cotton tip into the supplied plastic test tube.
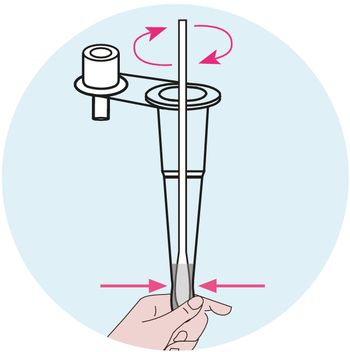
Dilute Sample In Tube
Press the swab specimen head against the inside of the tube and rotate the swab for 10-15 seconds, carefully mixing the sample.
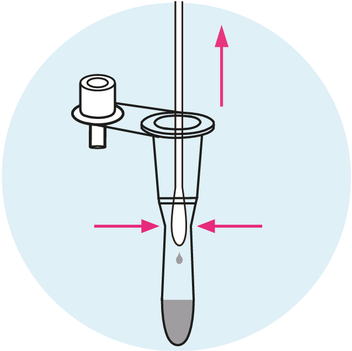
Remove Swab
Remove the swab while squeezing the swab head against the inside of the tube to release as much liquid as possible from the swab.
Note: Discard the swab in compliance with local regulations. Test should be performed immediately after the specimen is treated with buffer.
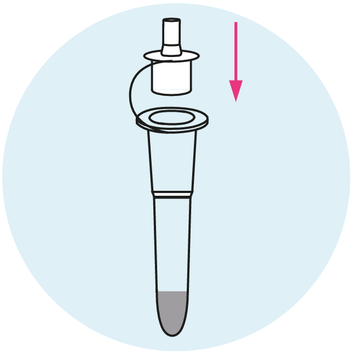
Close Tube
Tightly close the cap on the tube.
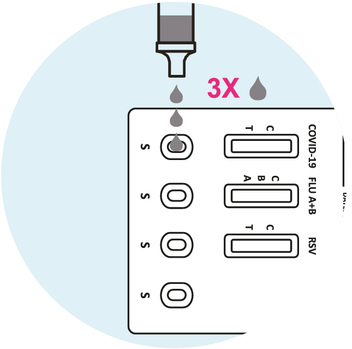
Apply To Cassette
Take the test cassette out of the foil pouch and place it on a flat and level surface. Invert the tube and add 3 drops of solution into each specimen well (S) respectively. Note:
Note: If a drop of solution added contains air bubbles, add another drop to the well

Wait and Read Results
Wait 10–20 minutes before reading the result.
Do not interpret results after 20 minutes, as they are considered invalid.
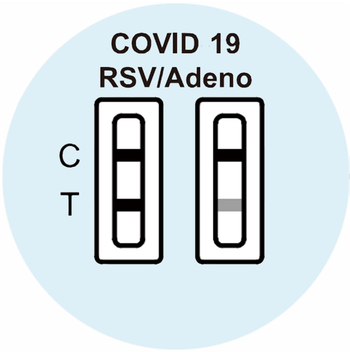
COVID-19/RSV/Adeno Positive
Two colored lines appear in the COVID-19/RSV/Adeno window.
One colored line should be in the control line region (C) and the other colored line should be in the test line region (T).
Note: The intensity of the colored line in the test line region (T) varies based on the amount of SARS-CoV-2, RSV, Adenovirus antigen present in the specimen. Thus any shade of a colored line in the test line region (T) should be considered a positive result.
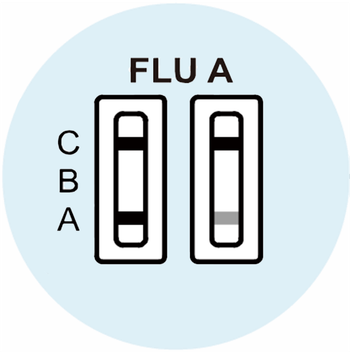
FLU A Positive
Two colored lines appear in the FLU A+B window.
One colored line should be in the control line region (C) and the other colored line should be in the FLU A region (A).
Note: The intensity of the colored line in the test line region (A) varies based on the amount of Influenza A antigen present in the specimen. Thus any shade of a colored line in the test line region (A) should be considered a positive result.
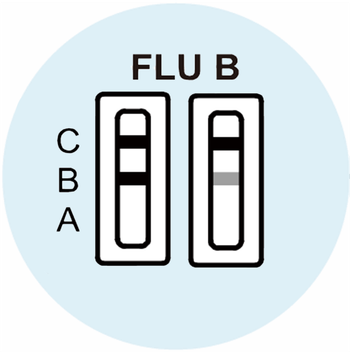
FLU B Positive
Two colored lines appear in the FLU A+B window.
One colored line should be in the control line region (C) and the other colored line should be in the FLU B region (B).
Note: The intensity of the colored line in the test line region (B) varies based on the amount of Influenza B antigen present in the specimen. Thus any shade of a colored line in the test line region (B) should be considered a positive result.
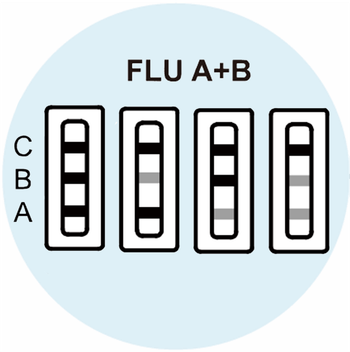
FLU A + FLU B Positive
Three colored lines appear in the FLU A+B window.
One colored line should be in the control line region (C) and two colored lines should be in the FLU A region (A) and FLU B region (B) respectively.
Note: The intensity of the colored line in the test line region (B/A) varies based on the amount of Influenza A, Influenza B, antigen present in the specimen. Thus any shade of a colored line in the test line region (B/A) should be considered a positive result.
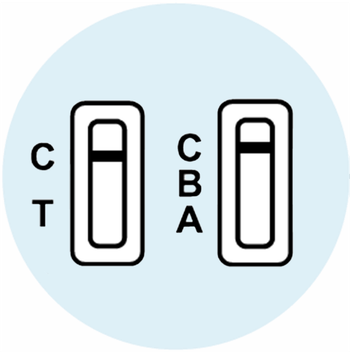
Negative Results
Only one colored line appears in the control line region (C).
No colored line appears in the test line regions (T/B/A). It indicates that there are no SARS-CoV-2/ Influenza A/Influenza B/RSV/Adenovirus antigens in the specimen or that their amount is too small to be detected.
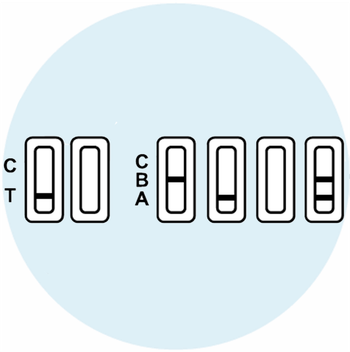
Invalid Resuls
The line in the control line region (C) fails to appear.
Incorrect testing procedure or test reagent deterioration are the most likely reasons. Please review the testing procedure and repeat the test with a new test kit.