
Video instruction
Text instruction

Wash Hands
This will increase blood circulation in your fingers. Dry your hands. Doing a blood test without stimulating blood circulation might prove difficult, so please do not skip this step.
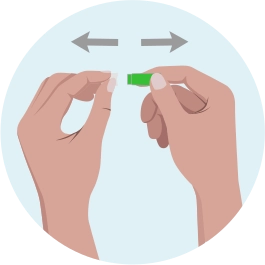
Prepare Lancet
Remove the protective cover on the blood lancet.

Disinfect Finger

Place Hand On Flat Surface
Put the lancet diagonally toward the test finger and press down the button. Make sure the lancet is pressed against the finger the whole time.

Help Blod Flow

Collect In Provided Dropper
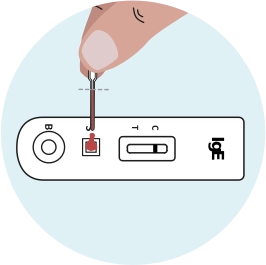
Add Blood To "S"
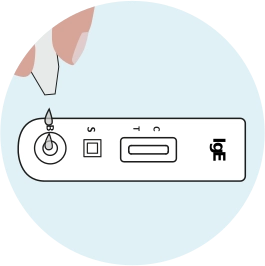
Add Buffer To "B"

Wait
Let sample lay on a flat surface. Wait for 10 minutes.
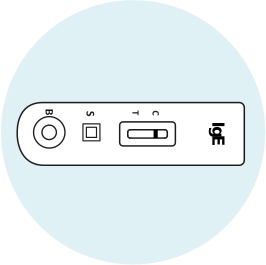
Read Results
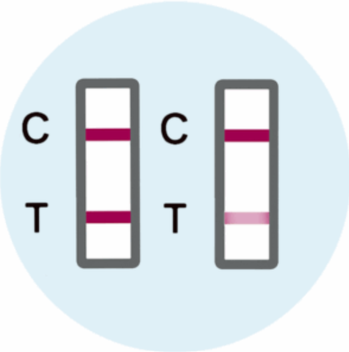
Positive results (IgE detected)
Two distinct colored lines appear. One line in the control region (C) and one in the test region (T).
This indicates that the specimen contains detectable levels of IgE antibodies.
Note: The intensity of the color in the test line region (T) will cary depending on the concentration og IgE present in the specimen. Therefore, any shade of red in the test region should be considered positive.
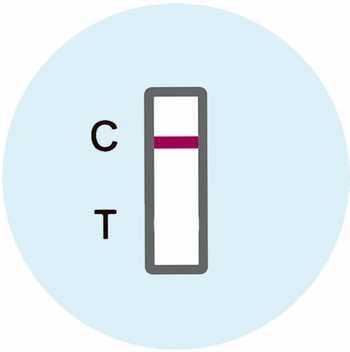
Negative results (No IgE detected)
Only one line appears in the control region (C). No line is visible in the test region (T).
This indicates that the specimen does not contain detectable IgE antibodies, or the level is below the detection limit.
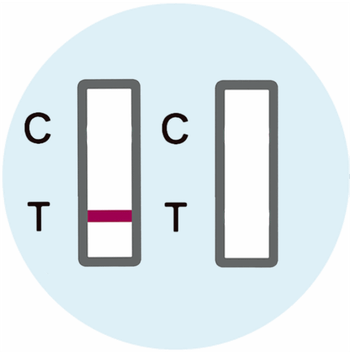
Invalid results
No line appears in the control region (C).
This means the test did not run correctly. The most likely reasons are insufficient specimen volume or incorrect procedural technique. Repeat the test with a new cassette.