
Video instruction
Text instruction
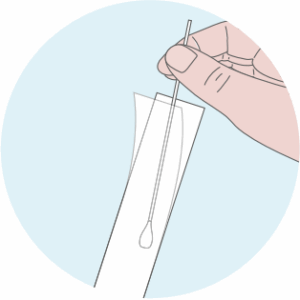
Open Package Containing Sterile Swab
Remove the test cassette from the foil pouch and use it within one hour. Proceed with vaginal swab.
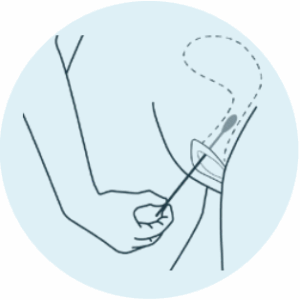
Collect Vaginal Sample
Use the swab provided in the kit. Before collecting the sample, gently remove excess mucus from the vaginal area with a cotton ball and discard it.
Insert the swab into the vagina, approximately 2 inches (5 cm)—to ensure it reaches the columnar or cuboidal epithelial cells, which are the primary carriers of the gonorrhea organism. Swab near the cervix.
Rotate the swab firmly in one direction (360 degrees) and leave it in place for about 15 seconds. Then carefully withdraw the swab.
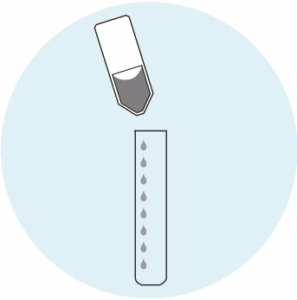
Open Extraction Tube
Open the provided extraction tube. Add entire extraction buffer.
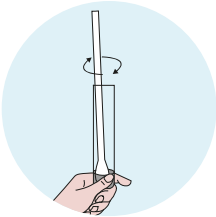
Add Swab
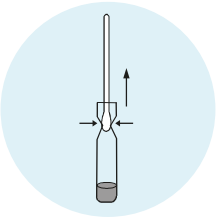
Remove Swab
Press the swab against the side of tube and withdraw the swab while squeezing the tube.
Keep as much liquid in the tube as possible.
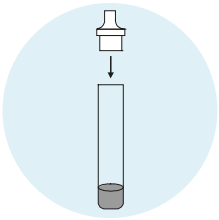
Attach Dropper Tip
Attach the dropper tip to the top of the extraction tube.
Dispose of the swab properly.
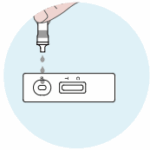
Apply To Cassette
Place the test cassette on a clean and level surface.
Add three (3) full drops of the solution to the sample well and then start the timer (10 minutes).

Wait
Wait for the line/lines to appear.
Read the results at ten minutes. Do not interpret the result after 20 minutes.
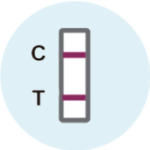
Positive Results
Find result window and look carefully for two lines.
If you see two lines, Control (C) line and Test (T) line, this means signs of Candida overgrowth were detected.
If you have symptoms (e.g. persistent fatigue, digestive issues, skin problems, or yeast infections) that affect your quality of life, it's a good idea to contact a doctor or therapist.
If you're symptom-free, you can monitor and follow up if needed.
Negative Results
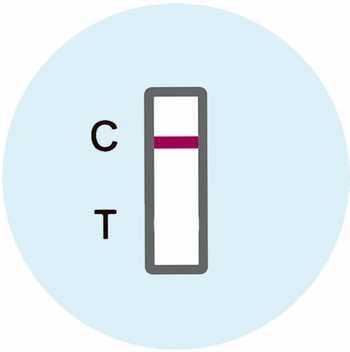
Find result window and look for a single line in window.
If you see only the Control (C) line is present this means the bacteria and or pathogen is not detected.
Invalid Results
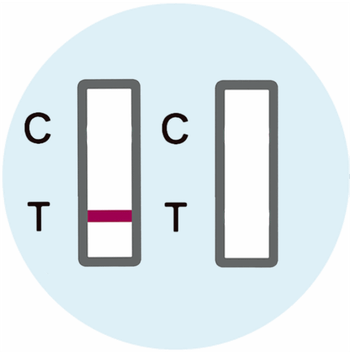
Find the result window. If NO Control (C) line is present, the test did not work and is considered Invalid.
This may be the result of an incorrect test procedure and the test should be repeated.