
Video instruction
Text instruction
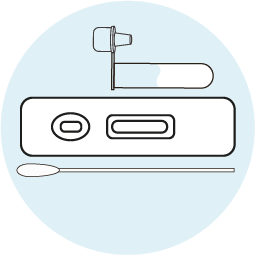
Step 1
Allow all materials, including specimen and test device,
recover to 15–25°C before running the assay.
Take out the test card from the foil pouch and place it horizontally.
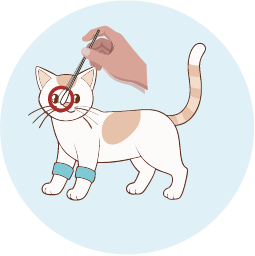
Step 2
Collect ocular and nasal secretions using the cotton swab.
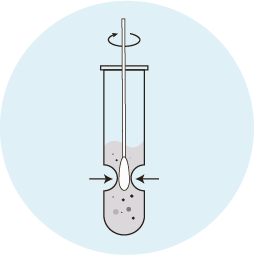
Step 3
Tear off the foil film of the extraction tube. Immerse the swab into the extraction
tube, and rotate the swab head in the sample diluent for at least 10 seconds.
At the same time, squeeze the swab head through the outer wall of the extraction
tube at least 5 times to ensure that the sample can be fully eluted into the diluent.
Then squeeze the swab head as dry as possible through the outer wall of the
extraction tube. Discard the swab and cover the extraction tube for use.
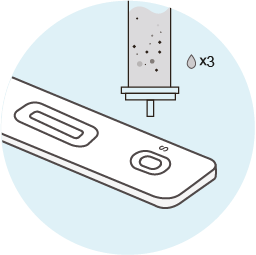
Step 4
Place the kit on a horizontal surface. Add 3 drops of the mixture into the sample
well of the test kit.

Step 5
Read the result in 10–30 minutes and the result is invalid after 30 minutes.
Step 6
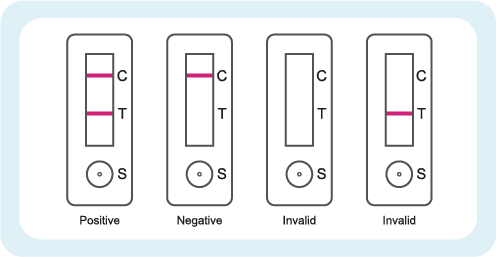
Positive result:
Red bands appear in both the test line (T) and the control line (C).
The results showed that the sample contained feline calicivirus.
Negative result:
A red band only appears in the control line (C) on the result window.
The results showed that the sample did not contain feline calicivirus.
Invalid result:
If there is no red band in the control line (C), the result is invalid.
A re-test is recommended.
Note: Even if the control line (C) or test line (T) is faint or not uniform, the test should be considered to have been performed properly, and the test result should be interpreted as above. Positive results should be interpreted by the veterinarian in conjunction with the clinical history and other available data.