
Video instruction
Text instruction

Register Test-ID
Before you start, you need to register your test-ID. Your test kit contains a sticker with your unique test-ID. If you need help creating an account, you can check our guide.
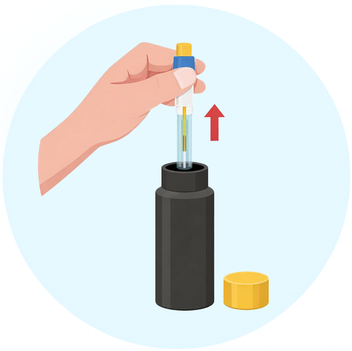
Open The Transport Tube
Open the tranpsport tube and pull out the sampling tube inside of it.
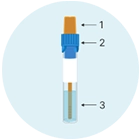
Keep Tube Upright
Please keep in mind that the tube contains liquid. Once you have opened the tube, it is important that you keep it upright until you close it again.
1 - dosing stick
2 - collects excess feces
3 - liquid
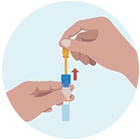
Pull Out The Dosing Stick
Hold the blue part of the tube and pull out the yellow dosing stick with the other hand. Make sure to keep the tube standing upright so the liquid doesn’t spill out.
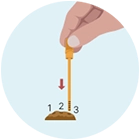
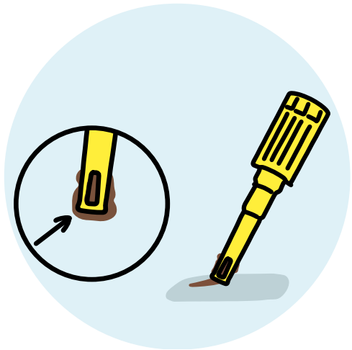
Collect Feces At 3 Places
Insert the dosing stick at 3 different places in the stool. The construction on the lower part of the dosing stick will pick up enough stool.
Remove Excess
Remove excess stool from the top of the sample lance.
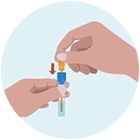
Put The Dosing Stick Bask Into The Tube
Put the dosing stick back in the tube. When you have inserted the dosing stick completely into the tube, turn it until you hear a click.
Note that the solution will not change color – or very little – this is correct! It should not turn to brown.
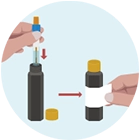
Place Histamine Tube In Transport Container And Attach Test-ID
Put the tube in the transport container. Label the tube with your unique test ID. Put the transport container in the enclosed envelope together with the other tubes.

Sending Sample
Put the tube in the pre-stamped envelope.
Note: Send your sample at the beginning of the week (preferably Monday or Tuesday) to avoid delays. Keep the sample refrigerated until sending.
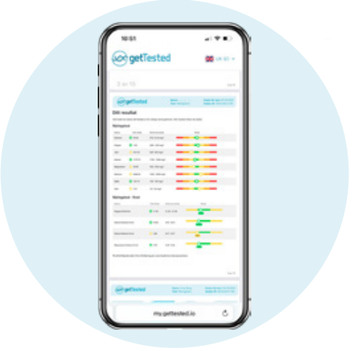
Wait 6-8 Weeks For Results
Once your results are ready, you can download them on your account.
Usually available in 6-8 weeks.