
Video instruction
Text instruction
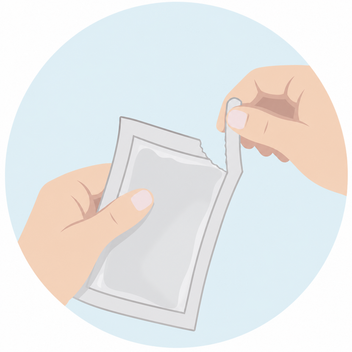
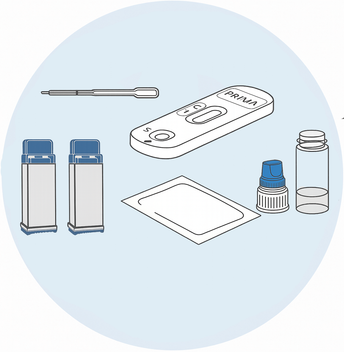
Prepare the Test Kit
Open the foil pouch and remove the test cassette. Discard the desiccant packet.
Open the pipette package and unscrew the white cap from the diluent bottle
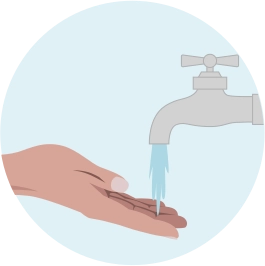
Wash Your Hands
Wash your hands with warm water and soap. Rinse thoroughly and dry completely. Warm water helps improve blood flow.

Clean the Finger
Clean the fingertip using the provided gauze.
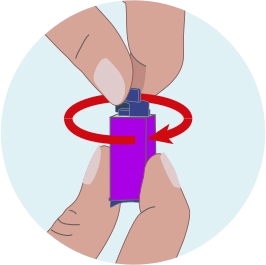
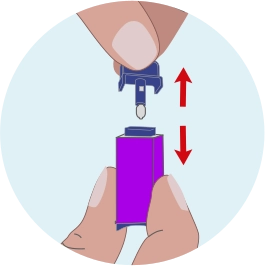
Prepare the Lancet
Twist the protective cap of the sterile lancet until it comes off, then discard the cap.
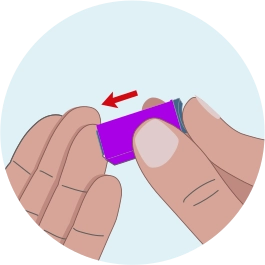
Collect a Blood Drop
Gently massage the selected finger, preferably the side of the ring finger, from the palm towards the fingertip to increase blood flow.
Press the lancet firmly against the fingertip and activate itIf the first lancet does not work, use the spare lancet provided.
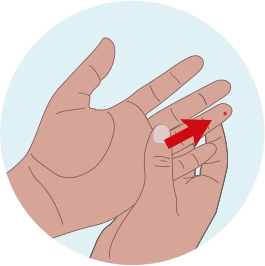
Encourage Blood Flow
Keep your hand pointing down and continue massaging the finger until a large drop of blood forms.
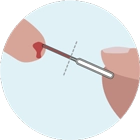
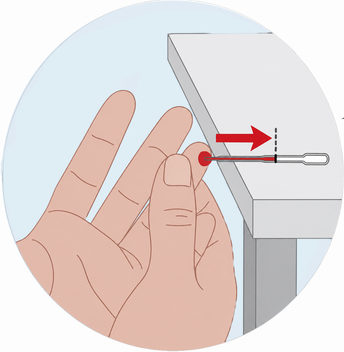
Fill the Pipette
Collect the blood using the pipette. Do not squeeze the bulb before collecting the sample.
There are two different methods to collect the sample in the pipette, select the one below that suits you best.
Method 1: Hold the pipette horizontally and touch the tip to the blood drop. The blood will fill the pipette automatically. Stop when the blood reaches the black line.
Method 2: Place the pipette on a clean, flat surface with the tip extending over the edge. Touch the blood drop to the tip and allow the blood to fill the pipette until it reaches the black line.
Note: If needed, continue massaging the finger until enough blood is collected. Avoid repeatedly removing and replacing the pipette tip, as this may create air bubbles.
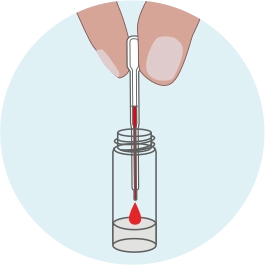
Transfer the Sample
Transfer the collected blood into the diluent bottle by squeezing the pipette bulb.
Press the bulb 2–3 times to ensure all blood is released. Screw the white cap back onto the bottle and mix well.
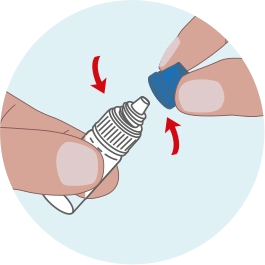
Open the Dropper Bottle
Unscrew and remove the blue cap from the bottle while leaving the white cap securely attached.
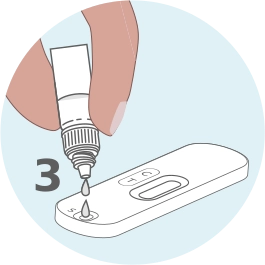
Add the Sample
Add 3 drops of the prepared solution into the sample well marked "S" on the test cassette.
Wait 3–5 seconds between each drop. If a drop contains an air bubble, add one additional drop.

Read the Result
Read the result after 10 minutes.
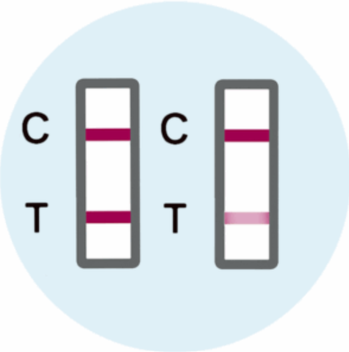
Positive Results
Two coloured lines appear in the reading window next to the C (Control) and T (Test) signs.
This means that the test has detected the presence of HIV 1 and/or HIV 2 ant bodies in the sample.
The colour intensity in the test line regions may vary depending on the concenitration of HIV 1 and/or HIV 2 antibodies present in the sample (as seen in the images).
Therefore, any shade of colour in the T line region, even if fainter than those shown in the images, should be considered as a positive result. Do not take any decision of medical relevance without first consulting your medical practitioner after performing the test.
What should I do?
Contact your physician and report this result because you are probably seropositive (specific antibodies have been detected in your blood, indicating the presence of the virus).
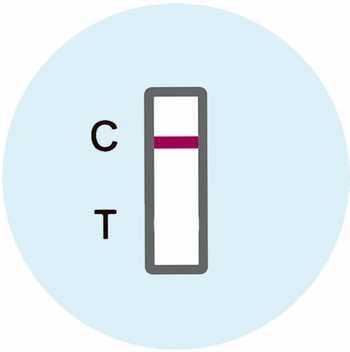
Negative Result
A single-coloured line (of any intensity) appears next to the C (Control) sign. No line appears next to the T (Test) sign.
This means the HIV1 and HIV 2 antibodies are either not present or are present in very low concentrat, not detectable by this diagnostic system.
What should I do?
If the result is negative, but you think that you have been exposed to HIV in the last 3 months it is possible that antibodies have not produced yet by your body (window period which is the time required for the development of a detectable amount of HIV ant bodies).
In this case it is recommended to repeat the test 3 months after the possible exposure and please avoid any activity that may cause HIV transmission to others.
If you have symptoms that can be traced back to HIV contact your doctor anyway.
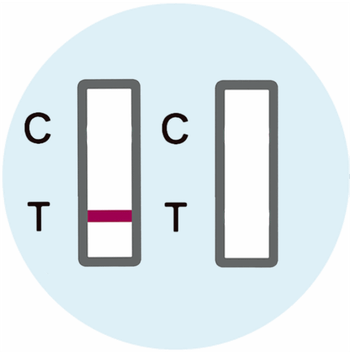
Invalid Result
No bands appear or there is a line only next to the T (Test) sign and not next to the C (Control) sign.
In this case it is not possible to interpret the result of the test, which must be considered not valid. Insufficient sample volume or incorrect procedural techniques are the most likely reasons for the absence of the Control line (invalid result).
Review the procedure and repeat the test with a new device and a new blood sample.