
Video instruction
Text instruction
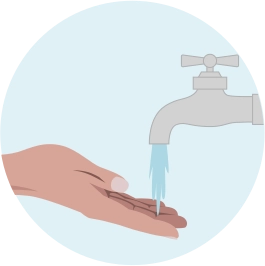
1
Step 1
Wash thoroughly with warm water and soap. Rinse with clean water and dry.
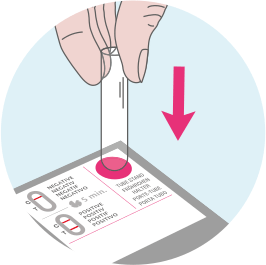
2
Step 2
Prepare the test materials Place the empty plastic test tube in the holder in the box. Open the package with the tongue depressor (leave it partly in the wrapper) and place it next to you.
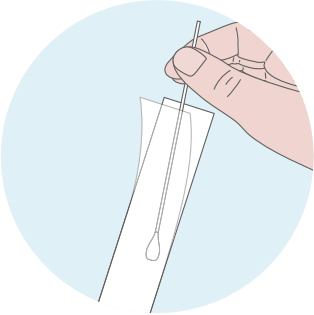
3
Step 3
Open the swab Take out the sterile swab from its package.
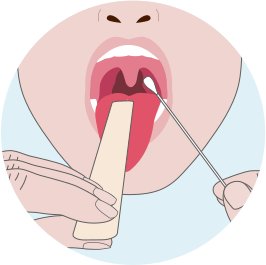
4
Step 4
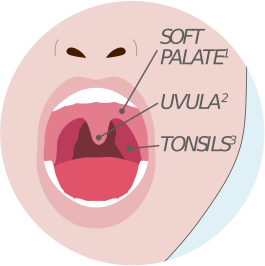
Prepare for sample collection Stand in front of a mirror. Tilt your head back and open your mouth as wide as possible. Use the tongue depressor in one hand to press the tongue down. Hold the swab in the other hand.
5
Step 5
Collect the sample Gently rub the swab on: The back of the throat (soft palate & uvula) Around the tonsils Any red or painful areas Try to avoid your tongue, teeth and the inside of your cheeks to not contaminate the sample. IIf you are struggling, ask someone to help you collect the sample.
6
Step 6
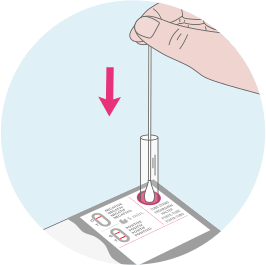
Insert swab into the tube Place the swab into the empty plastic test tube.
7
Step 7
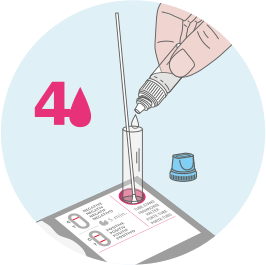
Add solution R1 Open vial STREP A TEST - R1 by unscrewing the blue cap (keep the white part sealed). Add 4 drops into the test tube, then close the cap.
8
Step 8
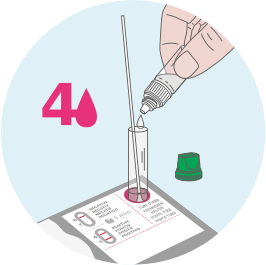
Add solution R2 Open vial STREP A TEST - R2 by unscrewing the green cap (keep the white part sealed). Add 4 drops into the same test tube, then close the cap.
9
Step 9
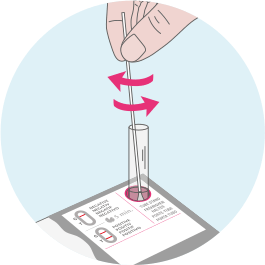
Mix the sample Rotate the swab against the inside of the tube about 10 times to mix. Leave the swab in the liquid for 2–5 minutes .
10
Step 10
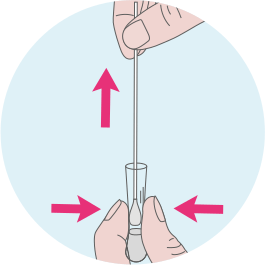
Squeeze out liquid After 2–5 minutes: Remove the tube from the holder. Press the tube sides with your fingers to release as much liquid as possible from the swab. Remove and discard the swab.
11
Step 11
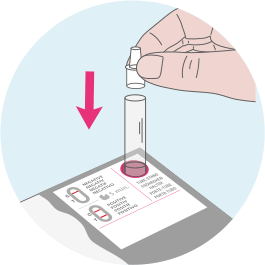
Prepare for testing Attach the supplied dropper tip to the tube.
12
Step 12
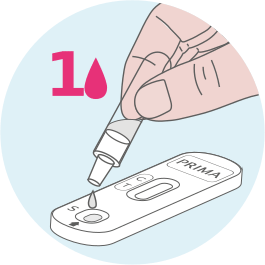
Dispense 1 drop into the sample well on the test cassette.

13
Step 13
Read the results Check results after 5 minutes . Do not read after 10 minutes , as the result will no longer be valid.
14
Step 14
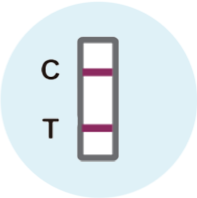
Positive results. Find result window and look carefully for two lines. If you see two lines, Control (C) line and Test (T) line, this means specific antigens for Group A Streptococcus are detected in the sample. If necessary, contact your doctor for further evaluation and possible treatment. A Strep A infection can sometimes resolve on its own, but medical assessment is recommended to prevent complications and ensure proper care.
15
Step 15
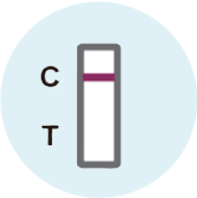
Negative results. Find result window and look for a single line in the window. If you see only the Control (C) line, this means no specific antigens for Group A Streptococcus are detected in the sample.
16
Step 16
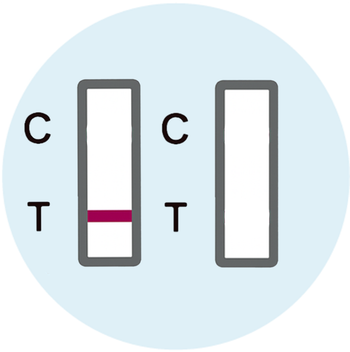
Invalid results. Test did not work. Find the result window. If NO Control (C) line is present, the test did not work and is considered Invalid. This may be the result of an incorrect test procedure and the test should be repeated.